Does anyone know how to remove the cover that covers the pilar behind the drivers seat where the low voltage unit is attached? I removed all of the screws and it still does not want to come off. It acts like it is attached some place from behind still? I dont want to get rough and force it and end up breaking it because its just fiberglass covered with cloth.
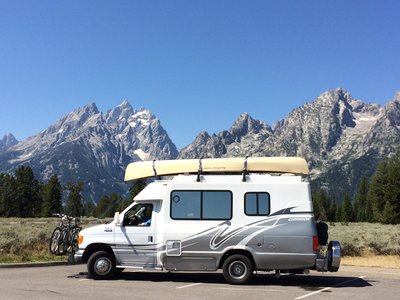
This isnt my rig but it shows the piece.....
Pilar Cover Removal?

Re: Pilar Cover Removal?
I think I wrote about this somewhere, but maybe not. At any rate, I have removed both of the pillars (along with the top center cover). I found some guidance from another Chinooker (Stephen) before attempting it.
Basically there are two "tricks."
One is that the pillar (which is fiberglass as you surmised) has a flat flange of about 1" wide running the length of the pillar on the outboard side. This flange tucks behind the wall (in this case, the couch wall; on the other side, the dining wall). You have to pry and coax the pillar out from behind that wall. The flange is not anchored at all, but just purposely trapped.
There was one additional complication on my rig on the driver's side, and that is that there was a coax cable about halfway down that was hampering things. I had to get in there with the pillar half off and deal with that, but yours may not have that. This did not exist on the passenger side.
There is open celled foam glued to the fiberglass outer wall that the pillar presses against, so compressing that may help.
Here is a photo that shows the flange on my passenger side pillar. It's the same on the driver's side.
Now, as long as you don't want to actually remove the pillar from the rig, you are done. The pillar will be removed but just won't be able to leave the rig due to the seatbelt. But in most cases there is likely no need.
Trick two came about because I wanted to completely remove the pillars from the rig. This involves detaching the seatbelt. It "would be" a simple operation but for the fact that Chinook's pillars are "puffier" than the standard Ford pillars. Hence it is difficult to get the triangular plastic piece off that covers the top of the seatbelt. You either have to devise a tool to get up in there and pinch the release (to get to the bolt behind it), or slide a wrench in behind it and turn 1/9000'th of a turn at a time until it is out. I removed the plastic covers with a homemade tool. T
After that it is simply a matter of unbolting the bottom of the seat belt where it attaches to the Ford and then re-bolting it in place after unthreading it from the pillar cover (presuming you want to drive while the pillar is off). But again, if you just want to move the pillar out of the way, you can keep the seatbelt threaded through it and no need to go through the removal of the seat belt part.
Basically there are two "tricks."
One is that the pillar (which is fiberglass as you surmised) has a flat flange of about 1" wide running the length of the pillar on the outboard side. This flange tucks behind the wall (in this case, the couch wall; on the other side, the dining wall). You have to pry and coax the pillar out from behind that wall. The flange is not anchored at all, but just purposely trapped.
There was one additional complication on my rig on the driver's side, and that is that there was a coax cable about halfway down that was hampering things. I had to get in there with the pillar half off and deal with that, but yours may not have that. This did not exist on the passenger side.
There is open celled foam glued to the fiberglass outer wall that the pillar presses against, so compressing that may help.
Here is a photo that shows the flange on my passenger side pillar. It's the same on the driver's side.
Trick two came about because I wanted to completely remove the pillars from the rig. This involves detaching the seatbelt. It "would be" a simple operation but for the fact that Chinook's pillars are "puffier" than the standard Ford pillars. Hence it is difficult to get the triangular plastic piece off that covers the top of the seatbelt. You either have to devise a tool to get up in there and pinch the release (to get to the bolt behind it), or slide a wrench in behind it and turn 1/9000'th of a turn at a time until it is out. I removed the plastic covers with a homemade tool. T
After that it is simply a matter of unbolting the bottom of the seat belt where it attaches to the Ford and then re-bolting it in place after unthreading it from the pillar cover (presuming you want to drive while the pillar is off). But again, if you just want to move the pillar out of the way, you can keep the seatbelt threaded through it and no need to go through the removal of the seat belt part.
1999 Concourse
Re: Pilar Cover Removal?
I have the seat belt unbolted and all of the screws that are visible removed. I can tell there are no screws remaining because i can flex the panel around a bit but it still seems snug at the bottom by the floor as well as at the wall area. I just need to get behind there to route solar cables and run them threw the floor. I think im gonna have to figure some other way of routing cables, im just not willing to destroy that panel trying to get it out. Im guessing you removed them after you had the overhead compartment taken apart?
Re: Pilar Cover Removal?
Well let's see, did you remove the forward couch trim panel? The one that has a "triangular" thing at the bottom that covers the LVD. Maybe that could be it.
Mine had a variety of snap studs and screws that held it to the side of the Ford cab (as you can see in photo) but nothing holding it to the Chinook side (because anything you screwed in there would come out on the outside of the Chinook body just behind the Ford door!). I did have that coax cable that was somewhat anchoring it though. Luckily I had removed the passenger side one first, so could tell there was something "extra" on the driver's side pillar. I had to reach in and deal with it. In my case, I had already removed all TV things (with no plans to reinstall) so I think I might have cut the coax cable then. Not saying that was necessary, but it was hung up.
It is an "OMG I am surely going to break SOMETHING" feeling getting the flange out from behind the wall.
1999 Concourse
Re: Pilar Cover Removal?
I removed that piece as well as the panel on the end of the couch because thats what i mounted the charge controller to. I removed the magazine rack and then cut a piece of 1/4" wood placed under the controller and mounted it to that cloth covered couch panel. But i think im going to forget the solar until i have time to figure something else out. If that panel is that difficult to get out then its going to be twice as hard to get it back in place without tearing it up. Poor design imo.
Re: Pilar Cover Removal?
Well i got the thing off of there finally. There was a run of wires jambed between the wall and that lip preventing it from pulling out from behind. Including an 8 awg battery cable.
Re: Pilar Cover Removal?
That sounds very similar to what mine was hung up on. If you ever remove the passenger side, it's much easier!
The 8 gauge wire is the (crazy) long run that does double duty as the wire from the batteries to the load center ("brown box") and the wire from the charger (brown box) to the batteries. It runs from the battery box (is that still on the driver's side on your 2005?) under the floor to a hole where it comes up under/in the driver's side pillar (that you just removed) and goes into the LVD. It then comes out of the LVD and goes up the pillar into the overcab. From the overcab it goes into the wiring chase that is in the outside wall outboard of the overhead cabinets (above the window) and runs all the way back to just aft of the wall that separates the kitchen sink and the shower. It then runs down that wall (between the shower fiberglass and that plywood wall) and then comes in by the fuel filler box and ends up at the brown box.
Yes, that's a ridiculously long run for an 8AWG wire carrying 45 amps or so (voltage drop city). When I re-did my wiring I not only went to a much larger wire, but I made a much shorter run (under couch along wall). I then had an 8AWG wire for other purposes. I also now have a separate charger and load wire, but I realize I'm getting out of this thread's subject area.
Anyway, glad you got the pillar off. I haven't put mine back on yet but from what I have read it's easier than getting it off. One can hope
1999 Concourse