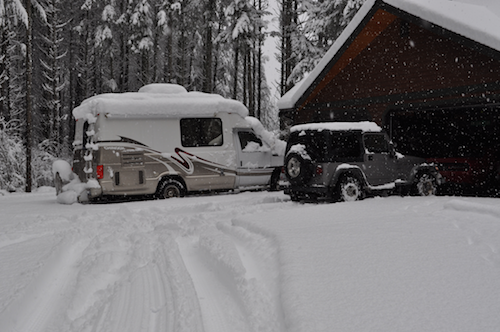

Well, here’s the first post with a few photos to come. This post might take a few months to complete since we still have lots of snow here but follow along, I will try to show every step of the way to help someone else out. As I’ve inquired and commented over a few other posts, my solar system is now in my hands. I’ve made a few concessions to keep it fairly simple but also effective and tried to make the install as simple as possible. But it never is...
Specs are as follows:
1 x 100 watt Renogy compact panels, 12AWG connectors attached
2 x 50 watt Renogy compact panels, 12 AWG connectors attached
10 AWG Renogy connector wires from the panels to the charge controller. I had bought 10 foot lengths so this will now work perfectly for the needed distance to the new charge controller location.
Renogy wire gland for entrance from the roof to the cabin
Sunforce 30 amp PWM charge controller
Two, Power Force ( Interstate but non branded) Group27 batteries, 105 amp hours each
I was going to just install it from there, but wait...
The final change was I just got a screaming deal on 2x25 rolls of 8AWG wire for $30 so am going to go the extra mile and upgrade the wires from the controller to the batteries. This was based primarily on the fact that my driver’s side trim panel behind the seat (see photo) was not installed correctly and needs to be pulled off and re-installed. This action alone was what prompted the upgrade because it had to be done and I will have easy access at that point to run two wires so why not. I wanted to look past it but just can’t.
Since re-doing the front carpet, I have the Torx 55 plus socket leftover to get the front seats out so with just a few bolts I should have the whole area open. Both of my beds need to come out as well to be painted before final install as well. Now, since this panel is open and I am now running new wires and I still have to get my TV bracket installed, I will also move the charge controller 6 feet closer to the battery banks and mount it in the old TV opening with a new TV bracket beside it, in one clean unit.
Not sure if that’s too much information, but there we are...
Full solar system install with pictures, tears and all :)
Full solar system install with pictures, tears and all :)
"Jewels" - '02 Chinook Concourse XL
Re: Full solar system install with pictures, tears and all :)
This photo shows the new wiring locations. Red lines for the new 10AWG wiring from the new panels, past the old charge controller over to the new location and the green wires which will be 8AWG, down to the batteries right below. The new TV bracket that extends 24" out will be mounted on a new panel and will extend into the main cabin so it is closer and centered between two viewers.
The red arrow shows the post cover not seated properly behind the wall panel which looks terrible.
The red arrow shows the post cover not seated properly behind the wall panel which looks terrible.
- Attachments
-
"Jewels" - '02 Chinook Concourse XL
Re: Full solar system install with pictures, tears and all :)
After a few good e-mails back and forth with Blue, I determined that my entry gland is too high to sit under my forward panel. I can shave it down to JUST fit but think I am pushing my luck so went another route. The old wiring entry point is approx. 28" back from the front edge (see Blue's original sketch) and I originally was hoping to re-use that hole but my connector is too tall and I would need to move my panels towards the back and they would have been too long. So, the new plan is to install the gland in front of the panel and seal the original connector just so it won’t leak but leave it in position.
The problem now begins that if you drill a hole into the roof at the front, it will be right in the inside of the Coach between the forward bulkhead wall where the original charge controller is and between the upper cabinet all exposed. The solution is to drill the hole approx. 6-8” ” back from the leading edge and have it enter inside the upper cabinet and out of view. I will turn the wires in towards the front and will run them along the side wall and in between the bulkhead wall and the side wall where they will fit through. I have lots of upholstery material so I might make a custom cover to hide them but you won’t be able to see them in that area too much.
The problem now begins that if you drill a hole into the roof at the front, it will be right in the inside of the Coach between the forward bulkhead wall where the original charge controller is and between the upper cabinet all exposed. The solution is to drill the hole approx. 6-8” ” back from the leading edge and have it enter inside the upper cabinet and out of view. I will turn the wires in towards the front and will run them along the side wall and in between the bulkhead wall and the side wall where they will fit through. I have lots of upholstery material so I might make a custom cover to hide them but you won’t be able to see them in that area too much.
- Attachments
-
"Jewels" - '02 Chinook Concourse XL
Re: Full solar system install with pictures, tears and all :)
These show where the roof flat panel starts approximately and how the wiring will run along the wall and eventually be hidden. Hole in the ceiling and wire entry location as well.
- Attachments
-
-
"Jewels" - '02 Chinook Concourse XL
Re: Full solar system install with pictures, tears and all :)
Overhead view of new approximate gland location with panels moved slightly backwards...
- Attachments
-
"Jewels" - '02 Chinook Concourse XL
Re: Full solar system install with pictures, tears and all :)
New panels, connectors and charge controller ready to go,100W panel just arrived!...First job will be making a mockup panel that covers the old TV opening for the charge controller and TV bracket, then gutting the interior again. Beds out since they need to be painted anyways, front drivers seat removed so I can get as much access as I can...I feel like I am going backwards!!
- Attachments
-
"Jewels" - '02 Chinook Concourse XL
-
HoosierB

- **Forum Contributor**
- Posts: 473
- Joined: May 21st, 2015, 7:00 pm
- Location: South Bend, Indiana
Re: Full solar system install with pictures, tears and all :)
I used mini cable raceway to hide an exposed cable for my hardwired rearview camera installation. It's a short exposed run in the same location your new wire run is to the bulkhead. Self-adhesive back and covered in matching wall fabric... hardly noticeable. I can easily install new panel wires later thru the same chase. I was too lazy to start yanking out wall panels for such an inconspicuous spot. I may consider using the same approach for my wire drop along the driver side pillar/side wall seam.Dano wrote: March 13th, 2019, 1:04 pmI will turn the wires in towards the front and will run them along the side wall and in between the bulkhead wall and the side wall where they will fit through. I have lots of upholstery material so I might make a custom cover to hide them but you won’t be able to see them in that area too much.
I'm watching this thread closely since my solar install will be very similar to yours. Please keep sharing any diagrams, measurements, pics, etc.
"Wanda" – '01 Chinook Concourse XL V10

Re: Full solar system install with pictures, tears and all :)
Dano: Where you show the wires running across the fabric wall just ahead of the cabinets but before the VCR area? You can very easily run them behind the wall there. In fact, that is where the Chinook wire chases are on each side. I have my entertainment cover and pillar covers off right now, so it's all super easy, but I also did a post some time back showing how to easily remove the cabinet "liners" to get to that wire space. No need for anything exposed and you will be following established routes. It's all just screws and easily removed/replaced pieces.
To get across, Chinook ran some wires where the entertainment wall touches the overhead, and some run underneath the overcab "floor" in the bulge of the entertainment cover. The overcab floor is just a piece of plywood sitting on the original Ford cab roof. But there is about 2" of extra plywood that overhangs rearward.
This thread was not about exactly what you are doing but it shows how to access the wire chase. Let me know if I can provide any other info - I have a bit of that exposed now.
viewtopic.php?f=8&t=856&p=7239&hilit=chase#p7239
To get across, Chinook ran some wires where the entertainment wall touches the overhead, and some run underneath the overcab "floor" in the bulge of the entertainment cover. The overcab floor is just a piece of plywood sitting on the original Ford cab roof. But there is about 2" of extra plywood that overhangs rearward.
This thread was not about exactly what you are doing but it shows how to access the wire chase. Let me know if I can provide any other info - I have a bit of that exposed now.
viewtopic.php?f=8&t=856&p=7239&hilit=chase#p7239
1999 Concourse
Re: Full solar system install with pictures, tears and all :)
I will be reading this thread word by word since I will be doing something almost identical. Very appreciate that Dano is putting this in one place for all of us to follow. I really like the fact that this forum enable us to learn from each others.
2000 Concourse dinette, on 1999 6.8L Ford E350 Triton V-10 Chassis
Re: Full solar system install with pictures, tears and all :)
Some reasonably accurate measurements correlate with what Blue came up with in his diagram. The antenna mast is right at about 11” back from the front edge. I measured from the front forward edge back to the cabinet, added in a thickness for both the cabinet wood and interior carpet and hit right at 11” so that’s good to start with. The crank handle sits 4.25” from the outside edge to the center of the crank.
- Attachments
-
"Jewels" - '02 Chinook Concourse XL