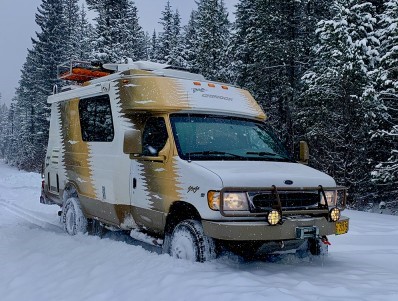
I will soon be removing three propane appliances - furnace, stove, and fridge - for my passenger side remodel. I frankly can't reach the propane lines running under the floor (fat body, short arms), so I will either need to disconnect the whole propane distribution network from the tank (looks like it connects using a flexible hose) or cap them off individually within the coach. Or, of course, take it to a shop where tall, skinny mechanics can reach stuff under the floor.
The one to the furnace is likely to be especially in the way where it is, because I want to use that as open space. I'd like to cap it off as low as possible so I'm less likely to damage it or myself.
The propane to the fridge or stove may be re-opened at some point to install a new, smaller furnace, but not in the next year or so.
Do you guys have recommendations for how to/how not to do this?
Capping propane lines
Capping propane lines
1999 Premier, now minus all passenger side cabinets and appliances 

Re: Capping propane lines
Well first of all, if you aren't comfortable working on it, of course don't. Propane (or gasoline, for that matter) can be dangerous.
But that said, it's not rocket science. You need a few tools, need to think ahead, and need to test the work when you are done. There are some real propane experts; but there are also people who will do a more careless job than you would. No one cares about your system more than you!
So, some background first. We have 3/8" propane lines, and the fittings are flare fittings (not compression or other). Flare fittings do not take any sealant or tape; they are simply tightened. The way it works is that the end of the copper line is "flared" with a tool so it looks a bit like the end of a trumpet. Before the flare is done, a threaded fitting is put onto the line (unless you forget and have to do it over ). Then the fitting on the other side has a built in tapered cone type shape that matches the flare. You match up the cone to the flare, then pull the threaded fitting down and tighten it up. Voila, they fit together with no leaks!
Here is a photo of a flared propane tube (line) with the fitting on it (they remembered to put it on before flaring ):
):
And here is the type of "coned" fitting that goes on the other side and fits into the flare bell. This happens to be a union, but there are T's, plugs, etc.
To cut the tubing you can use an inexpensive tubing cutter, easily available even at Lowe's etc. You tighten it onto the tubing, then spin it around while you continue tightening. Then you use something to de-burr the new cut (there is a de-burring tool, or you can use something homemade - it's just to smooth it off). To make the flare shape, there are common, easily found, relatively inexpensive tools (sometimes you can even borrow them from a "real" hardware store). Chinook used the best flare nuts, which are the long/forged type (resist vibration well). These are not easy to find, so make sure to hang onto them and re-use them (I did find some at McMaster Carr, IIRC).
Tubing cutter:
Flaring tool (there are different types):
Hmm, it let me do four attachments?! Okay, on to next post....
But that said, it's not rocket science. You need a few tools, need to think ahead, and need to test the work when you are done. There are some real propane experts; but there are also people who will do a more careless job than you would. No one cares about your system more than you!
So, some background first. We have 3/8" propane lines, and the fittings are flare fittings (not compression or other). Flare fittings do not take any sealant or tape; they are simply tightened. The way it works is that the end of the copper line is "flared" with a tool so it looks a bit like the end of a trumpet. Before the flare is done, a threaded fitting is put onto the line (unless you forget and have to do it over
). Then the fitting on the other side has a built in tapered cone type shape that matches the flare. You match up the cone to the flare, then pull the threaded fitting down and tighten it up. Voila, they fit together with no leaks! Here is a photo of a flared propane tube (line) with the fitting on it (they remembered to put it on before flaring
):- Flared tube end with female fitting.png (23.16 KiB) Viewed 12283 times
Tubing cutter:
- Tubing cutter.jpg (10.38 KiB) Viewed 12283 times
1999 Concourse
Re: Capping propane lines
Tools you need besides the above are a 13/16" spanner or crowfoot socket (for the good flare nuts; cheaper ones take 3/4"). And IIRC it's a 5/8" wrench for the appliance side. You ALWAYS want a wrench on both sides of a joint so that the wrenches are taking the stress NOT the fittings.
So, if you look at your appliances, you will see that they come with a 3/8" male (coned) fitting on them. Then Chinook ran the copper tubing to the appliance, put the flare nut on the tubing, flared the end, mated that flared end to the coned fitting on the appliance, then tightened up the flare nut. Voila.
Under the rig is where any other joints are (as is proper, yay Chinook!). So, for example there is a main propane line running to the area right under the fridge (by the exhaust pipes for the engines). That line has a double fitting on it, then a separate line from each fitting. One goes to the stove, one to the fridge. This is proper as you don't want joints inside the coach, especially in behind things (except obviously you have to have one at the appliance).
So, options:
1) You can cap (actually, plug) the lines right where they (did) attach to the appliances. You would then want to support the lines accordingly. Before starting anything light the stove, then shut off the propane at the tank, then when the stove goes out SHUT OFF the burner (easy to forget). Now you can work on the lines. So for plugging a line you buy a 3/8" flare plug, then, using the two wrenches you disconnect the Chinook copper line and flare fitting from the stove's fitting, place the coned plug into Chinooks flare, and tighten the fitting. You can tighten a fair amount, but obviously don't strip anything. If there is a leak it will be slight and you can tighten it a bit more. Once it's stripped you have to start over. The stove's fitting, is, IIRC, under the burner area. You could do the same for the refrigerator (line comes in outside by the lower vent), furnace (line comes in along the aft side of the furnace, and the water heater (line comes in between driver's seat and forward side of water heater).
The plus of plugging is that it's easy, and you can easily put the appliances back. You don't have to make any flares or cuts (you re-use the Chinook ones). The downside is you still have this joint inside, and you may have lines that need to be supported (especially longer ones like the stove one). You can do this with cushion clamps, but it's still a consideration.
If you do plug like this (or with any joint), get it tight (but not stripped), then get a test solution ready (they make special goop, or you can use bubbly/soapy water). You would turn the propane back on at the tank (obviously don't have any open flames or sparks going) and then brush some solution or water on the joints. You are looking for leaks, which likely wouldn't be huge, but just little "wizzles." The trick if you use soapy water is distinguishing between naturally popping bubbles and the bubbles that indicate a leak. A leak is usually a steady popping of bubbles in one particular place on the joint (use a mirror if you need to to check all sides). If there is a leak, use the two wrenches and tighten a bit more. That typically takes care of it. Re-check. An aside: If you have a good nose, you will also be able to smell even a tiny leak. The odorant they add to propane is pretty unique.
2) You can cut back one of the lines (like say you wanted to put in a new stove and didn't need the line to be as long) but using a tubing cutter to cut it in the right place, putting the flare nut back on, then flaring the line and then on you go. If you are going to do this I would advise buying some extra tubing to practice on. You can look at Chinook's original flare to get the idea - mine were all nice and tidy. That still leaves a joint inside if you cap it for now. (But of course you already had all these joints inside at the appliances, so it's no more than that.) If you do this, take care not to get copper bits down into the remaining lines.
3) You can undo the fittings underneath the rig where they branch off for the tubing to come up through the floor, and plug them there.
4) Also, if you do plug the lines inside, if you are removing everything for now of course you can also leave the tank shut off at the main valve (but still plug the lines properly and test for leaks first).
As mentioned above, don't do anything you are not comfortable with; propane can be dangerous! But then so can gasoline and tons of idiots fuel up every day. But you know what I mean: Don't do any of this is you are not comfortable with it (beyond a normal healthy discomfort you SHOULD have when working with any fuel or electricity), and not in the mood to be careful and methodical. There are a number of web pages and videos with tips as well. I just helped a friend remove his propane refrigerator plus put in a new line for a fireplace type heater and the RV manufacturer (not Chinook) did a sloppy job with the original installation. So much for the pros always being better (sometimes they are true pros of course).
So, if you look at your appliances, you will see that they come with a 3/8" male (coned) fitting on them. Then Chinook ran the copper tubing to the appliance, put the flare nut on the tubing, flared the end, mated that flared end to the coned fitting on the appliance, then tightened up the flare nut. Voila.
Under the rig is where any other joints are (as is proper, yay Chinook!). So, for example there is a main propane line running to the area right under the fridge (by the exhaust pipes for the engines). That line has a double fitting on it, then a separate line from each fitting. One goes to the stove, one to the fridge. This is proper as you don't want joints inside the coach, especially in behind things (except obviously you have to have one at the appliance).
So, options:
1) You can cap (actually, plug) the lines right where they (did) attach to the appliances. You would then want to support the lines accordingly. Before starting anything light the stove, then shut off the propane at the tank, then when the stove goes out SHUT OFF the burner (easy to forget). Now you can work on the lines. So for plugging a line you buy a 3/8" flare plug, then, using the two wrenches you disconnect the Chinook copper line and flare fitting from the stove's fitting, place the coned plug into Chinooks flare, and tighten the fitting. You can tighten a fair amount, but obviously don't strip anything. If there is a leak it will be slight and you can tighten it a bit more. Once it's stripped you have to start over. The stove's fitting, is, IIRC, under the burner area. You could do the same for the refrigerator (line comes in outside by the lower vent), furnace (line comes in along the aft side of the furnace, and the water heater (line comes in between driver's seat and forward side of water heater).
The plus of plugging is that it's easy, and you can easily put the appliances back. You don't have to make any flares or cuts (you re-use the Chinook ones). The downside is you still have this joint inside, and you may have lines that need to be supported (especially longer ones like the stove one). You can do this with cushion clamps, but it's still a consideration.
If you do plug like this (or with any joint), get it tight (but not stripped), then get a test solution ready (they make special goop, or you can use bubbly/soapy water). You would turn the propane back on at the tank (obviously don't have any open flames or sparks going) and then brush some solution or water on the joints. You are looking for leaks, which likely wouldn't be huge, but just little "wizzles." The trick if you use soapy water is distinguishing between naturally popping bubbles and the bubbles that indicate a leak. A leak is usually a steady popping of bubbles in one particular place on the joint (use a mirror if you need to to check all sides). If there is a leak, use the two wrenches and tighten a bit more. That typically takes care of it. Re-check. An aside: If you have a good nose, you will also be able to smell even a tiny leak. The odorant they add to propane is pretty unique.
2) You can cut back one of the lines (like say you wanted to put in a new stove and didn't need the line to be as long) but using a tubing cutter to cut it in the right place, putting the flare nut back on, then flaring the line and then on you go. If you are going to do this I would advise buying some extra tubing to practice on. You can look at Chinook's original flare to get the idea - mine were all nice and tidy. That still leaves a joint inside if you cap it for now. (But of course you already had all these joints inside at the appliances, so it's no more than that.) If you do this, take care not to get copper bits down into the remaining lines.
3) You can undo the fittings underneath the rig where they branch off for the tubing to come up through the floor, and plug them there.
4) Also, if you do plug the lines inside, if you are removing everything for now of course you can also leave the tank shut off at the main valve (but still plug the lines properly and test for leaks first).
As mentioned above, don't do anything you are not comfortable with; propane can be dangerous!
But then so can gasoline and tons of idiots fuel up every day. But you know what I mean: Don't do any of this is you are not comfortable with it (beyond a normal healthy discomfort you SHOULD have when working with any fuel or electricity), and not in the mood to be careful and methodical. There are a number of web pages and videos with tips as well. I just helped a friend remove his propane refrigerator plus put in a new line for a fireplace type heater and the RV manufacturer (not Chinook) did a sloppy job with the original installation. So much for the pros always being better (sometimes they are true pros of course).1999 Concourse
Re: Capping propane lines
Wow. Thank you for the primer! I was mostly still thinking about strategy - what I can reach, and what I could/should alter - but the detail on how to actually do the work will be extremely helpful. With the right keywords and concepts, I can hit up the YouTubes for more info.
1999 Premier, now minus all passenger side cabinets and appliances
Re: Capping propane lines
Hey, Blue,
I haven't replaced my hot water heater yet, but will soon. Do we have a 37 degree SAE or 45 degree SAE flare? I'm thinking for RV's 45 is more common, but if I end up needing to get a new fitting, or the flare tool, it'd be nice to be sure
Thanks,
Bob
I haven't replaced my hot water heater yet, but will soon. Do we have a 37 degree SAE or 45 degree SAE flare? I'm thinking for RV's 45 is more common, but if I end up needing to get a new fitting, or the flare tool, it'd be nice to be sure
Thanks,
Bob
Re: Capping propane lines
I believe they are 45º, but if I think of it I can look at the flaring tool I have (which does make the right flare). Hmm, maybe I can look up my receipt since the tool is not here in front of me. Will check.
Okay, yep, produces "45º SAE flares." I thought so but wanted to check.
Kirah... I re-read your question but I must be misunderstanding it. Can you elaborate?
Oh, on disconnecting the furnace fitting beneath the floor. It is dark and cold outside right now, but here is a photo I took previously when my Chinook was on a lift. It's annotated and shows what I think is the "furnace branch" where it connects under the rig. Since the branch line has the flare and flare fitting, you would use a cap on the main part (vs. a plug), after removing the branch line and the flare fitting. That'd be a 3/8" Flare cap. Should be easily soured at Home Depot or hardware store.
You may have to click once or twice to be able to read it.
Okay, yep, produces "45º SAE flares." I thought so but wanted to check.
Kirah... I re-read your question but I must be misunderstanding it. Can you elaborate?
Oh, on disconnecting the furnace fitting beneath the floor. It is dark and cold outside right now, but here is a photo I took previously when my Chinook was on a lift. It's annotated and shows what I think is the "furnace branch" where it connects under the rig. Since the branch line has the flare and flare fitting, you would use a cap on the main part (vs. a plug), after removing the branch line and the flare fitting. That'd be a 3/8" Flare cap. Should be easily soured at Home Depot or hardware store.
You may have to click once or twice to be able to read it.
1999 Concourse
Re: Capping propane lines
No worries. Re-reading it, I can see that I wasn't very clear.
My main problem is that when I'm laying on my back under the coach, almost everything related to the propane system is out of my reach. Like, I think I could reach it with a wrench, but not with enough of my fingertips to get a grip on anything.
As of today, I'm thinking that my best options are:
A) Disconnect and plug the furnace branch underneath by recruiting a friend with long arms to actually do the work. I'll trace the lines, and get the tools and supplies - I just need someone who can reach to turn things for me. Plug the indoor line for the stove and fridge where they will be out of the way, but accessible if I want to add something new (yay! new tools to learn!). This is the way to go if I really think I might want to add a new furnace or propane stove. I'm leaning this way.
B) Find a way to empty the tank, close the valve, disconnect or close off the hose, and put a tag on it that it is NOT safe to be refilled. Then I can just clip the lines flush at the floor, and go all-electric (this tank of propane reads half full and I filled it around 8 years ago - I do not use much of it anyway, so that's not much of a hardship).
My main problem is that when I'm laying on my back under the coach, almost everything related to the propane system is out of my reach. Like, I think I could reach it with a wrench, but not with enough of my fingertips to get a grip on anything.
As of today, I'm thinking that my best options are:
A) Disconnect and plug the furnace branch underneath by recruiting a friend with long arms to actually do the work. I'll trace the lines, and get the tools and supplies - I just need someone who can reach to turn things for me. Plug the indoor line for the stove and fridge where they will be out of the way, but accessible if I want to add something new (yay! new tools to learn!). This is the way to go if I really think I might want to add a new furnace or propane stove. I'm leaning this way.
B) Find a way to empty the tank, close the valve, disconnect or close off the hose, and put a tag on it that it is NOT safe to be refilled. Then I can just clip the lines flush at the floor, and go all-electric (this tank of propane reads half full and I filled it around 8 years ago - I do not use much of it anyway, so that's not much of a hardship).
1999 Premier, now minus all passenger side cabinets and appliances
Re: Capping propane lines
Looking at your photo again, a question: Are there plugs meant to fit in and block off where the branch lines normally connect? It looks like that would need a different kind of plug - kind of a flare nut without a pipe through it.
My Home Depot has next to nothing in stock for 3/8" fittings, so I'm trying to keyword search on their web site.
My Home Depot has next to nothing in stock for 3/8" fittings, so I'm trying to keyword search on their web site.
1999 Premier, now minus all passenger side cabinets and appliances
Re: Capping propane lines
Okay, so a few comments (I may be misunderstanding you, so if that's the case ignore).
1) I would NOT cut off any lines and put a tag on the tank. I just don't see any real reason to do that, and I can think of some negative consequences.
2) I'm not sure you want to empty the tank. This is something to research, but it may be better to leave propane in the tank (better for floats, the internal walls, etc.).
3) So now that I understand your situation better, here is what I would do:
A) Since you want to get rid of the propane line that comes into the living room by the furnace, then I would remove that one underneath the coach where I showed in the annotated diagram. Given that I see the furnace pipe has a flare nut, we can assume that the "tank side" of that line has a flare/cone type fitting, in which case a 3/8" flare cap will fit on it (no tape or sealant on flared fittings, note). Then you can pull the furnace branch copper and store it away (note: Don't fill the floor hole with steel wool, as this can oxidize and spontaneously combust. Better would be a permanent fill like thickened epoxy, or for temporary something like copper "mouse mesh," perhaps with some sealant on the underside. There is likely one of Chinook's plastic collars in the floor hole so you could leave that and fill the inside of it with the mesh (that's what I did for now on the former refrigerator drain hole).
B) Since you may want to re-use the stove and fridge lines, and since they are not in spaces where they are in the way, you could cap those off inside (this would be with 3/8" flare plugs, technically, not flare caps). That's because this is the reverse of the case in A, and you are filling the flare nut, not capping the flare cone.
The lines are held rigid in part by their attachment to the appliances, so you'll want to take care of that function another way. The refrigerator line may be stiff enough as is (IIRC),but the stove line is long and pendulous. You can use "cushion clamps" to affix it to the wall or the underside of the counter (I have posted a diagram that shows where wood is in the wall, at least in my '99 - see reference section). There is a false wall behind the stove, and the pipes come up behind that (both for stove and fridge). You may not need to get behind there if you anchor the stove line inboard of that.
Sure, shut the tank off, but I would probably not empty the tank (do research) and I would DEFINITELY cap or plug all lines and TEST them by opening the propane tank valve and using solution. Set it up AS IF someone WILL turn on the tank valve and let propane into the system.
I'm surprised that your Home Depot doesn't have the caps/plugs. I think I've seen them at both HD and Lowe's. But if not, most hardware stores will have them (sometimes on sliding wall panels that hide them behind other fittings. A hardware store may be easier and have better selection. Make sure they are 45º FLARE fittings, not compression or other type. You will see that they have either the male or female "cone" shape inside. Here is what I mean:
BTW, these are all easily available on Amazon, if that's easier.
Cap:
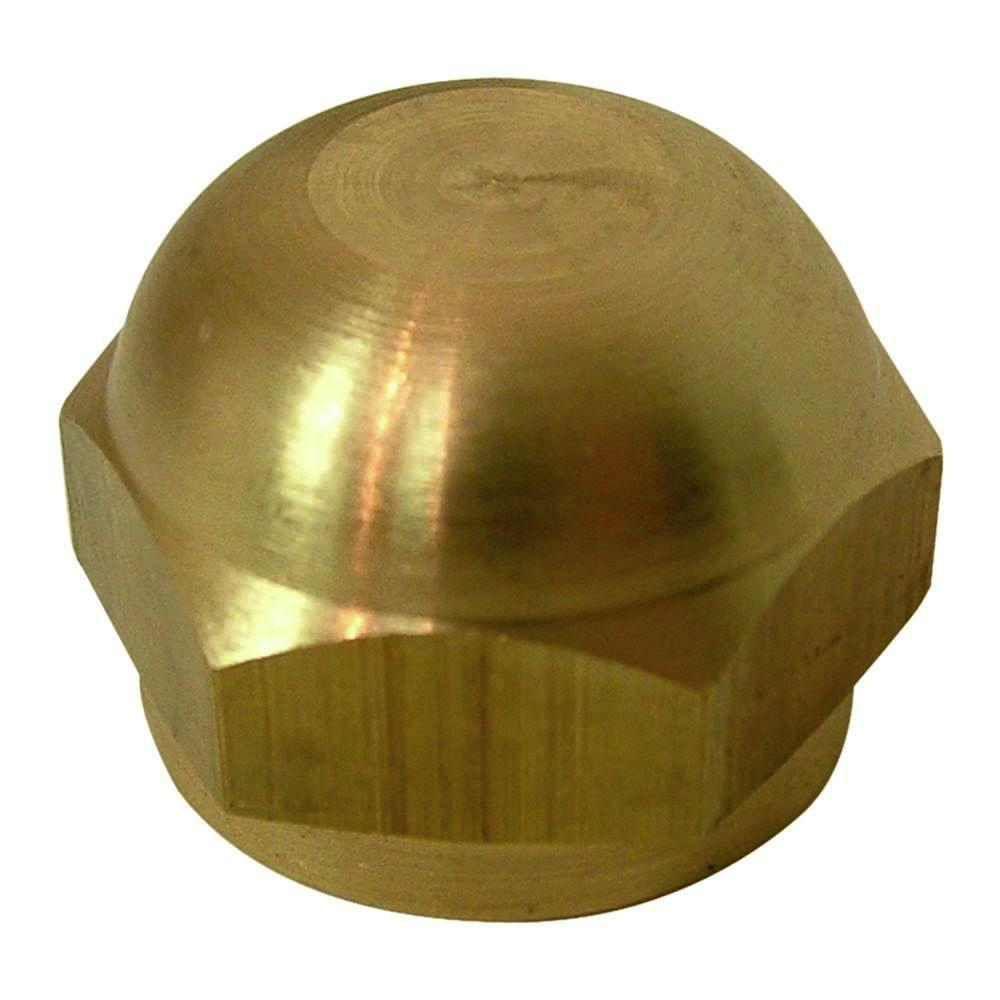
https://www.homedepot.com/p/Everbilt-3- ... /207176831
Plug:
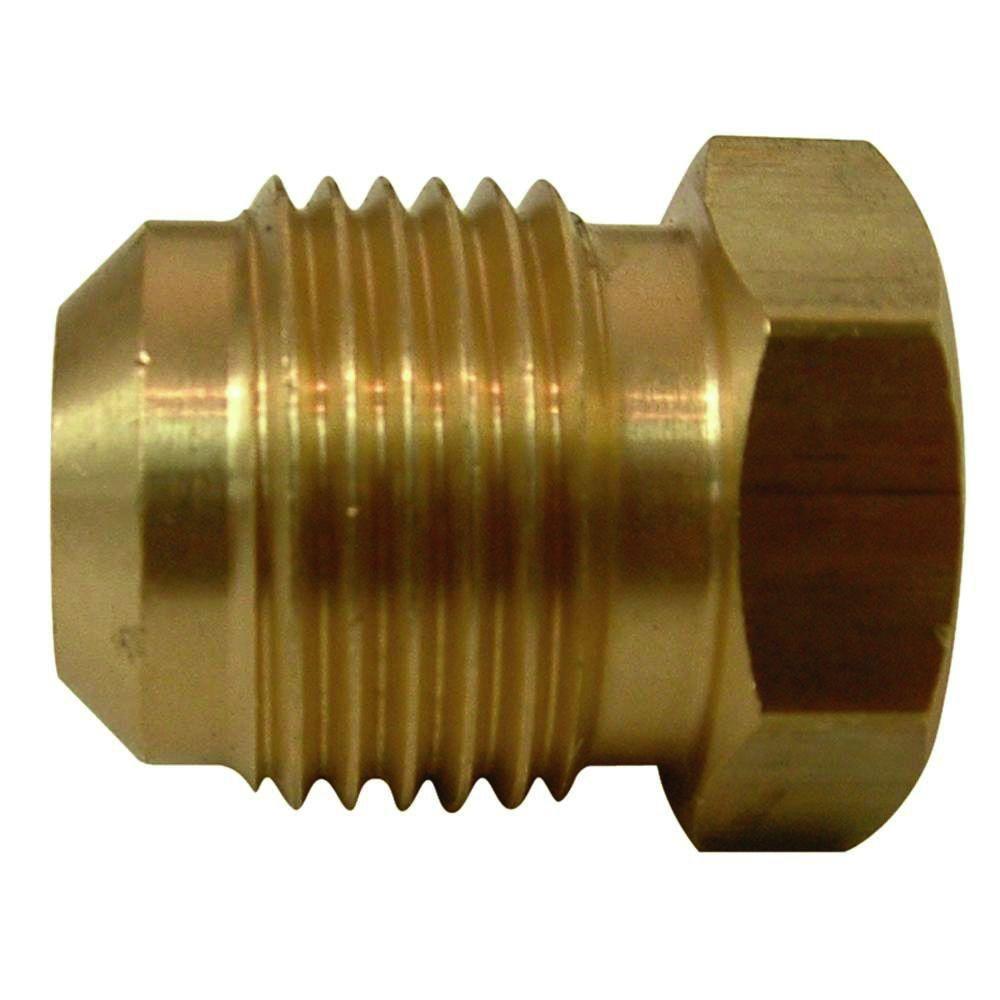
https://www.homedepot.com/p/Everbilt-3- ... /207176679
Cushion clamp (see how it has a rubber liner - that helps to protect the tubing): One note on these is the holes are usually fairly large, so you will want a decent sized washer under the screw, or a truss headed screw (big head).
https://www.amazon.com/Ancor-Marine-Ele ... th=1&psc=1
1) I would NOT cut off any lines and put a tag on the tank. I just don't see any real reason to do that, and I can think of some negative consequences.
2) I'm not sure you want to empty the tank. This is something to research, but it may be better to leave propane in the tank (better for floats, the internal walls, etc.).
3) So now that I understand your situation better, here is what I would do:
A) Since you want to get rid of the propane line that comes into the living room by the furnace, then I would remove that one underneath the coach where I showed in the annotated diagram. Given that I see the furnace pipe has a flare nut, we can assume that the "tank side" of that line has a flare/cone type fitting, in which case a 3/8" flare cap will fit on it (no tape or sealant on flared fittings, note). Then you can pull the furnace branch copper and store it away (note: Don't fill the floor hole with steel wool, as this can oxidize and spontaneously combust. Better would be a permanent fill like thickened epoxy, or for temporary something like copper "mouse mesh," perhaps with some sealant on the underside. There is likely one of Chinook's plastic collars in the floor hole so you could leave that and fill the inside of it with the mesh (that's what I did for now on the former refrigerator drain hole).
B) Since you may want to re-use the stove and fridge lines, and since they are not in spaces where they are in the way, you could cap those off inside (this would be with 3/8" flare plugs, technically, not flare caps). That's because this is the reverse of the case in A, and you are filling the flare nut, not capping the flare cone.
The lines are held rigid in part by their attachment to the appliances, so you'll want to take care of that function another way. The refrigerator line may be stiff enough as is (IIRC),but the stove line is long and pendulous. You can use "cushion clamps" to affix it to the wall or the underside of the counter (I have posted a diagram that shows where wood is in the wall, at least in my '99 - see reference section). There is a false wall behind the stove, and the pipes come up behind that (both for stove and fridge). You may not need to get behind there if you anchor the stove line inboard of that.
Sure, shut the tank off, but I would probably not empty the tank (do research) and I would DEFINITELY cap or plug all lines and TEST them by opening the propane tank valve and using solution. Set it up AS IF someone WILL turn on the tank valve and let propane into the system.
I'm surprised that your Home Depot doesn't have the caps/plugs. I think I've seen them at both HD and Lowe's. But if not, most hardware stores will have them (sometimes on sliding wall panels that hide them behind other fittings. A hardware store may be easier and have better selection. Make sure they are 45º FLARE fittings, not compression or other type. You will see that they have either the male or female "cone" shape inside. Here is what I mean:
BTW, these are all easily available on Amazon, if that's easier.
Cap:
https://www.homedepot.com/p/Everbilt-3- ... /207176831
Plug:
https://www.homedepot.com/p/Everbilt-3- ... /207176679
Cushion clamp (see how it has a rubber liner - that helps to protect the tubing): One note on these is the holes are usually fairly large, so you will want a decent sized washer under the screw, or a truss headed screw (big head).
1999 Concourse
Re: Capping propane lines
Okay, thanks so much! I didn't realize it could damage the tank to sit empty. Sounds like I should scratch that option. Which pretty much leaves doing things properly. Pfft. 
I saw those caps when I was wandering around on the HD web site, but hadn't yet figured out why you'd use a cap vs a plug.
My local Home Depot is such a mess. They list on their site that they have two of the 3/8" flare plugs in inventory, but standing in the store, looking in the location they indicated, damned if I could spot them. I asked an employee, who poked around for a couple of minutes and just apologized. I found the carton where they should have been - it had other odds and ends in it. Home Depot's inventory system generally seems to be pretty awful. I once hit three stores to find enough matching concrete blocks to finish a yard project. One store was missing a pallet of them, another was missing 3 pallets. If you can lose 3 pallets of wall blocks, I imagine a couple of brass fittings is nothing
I saw those caps when I was wandering around on the HD web site, but hadn't yet figured out why you'd use a cap vs a plug.
My local Home Depot is such a mess. They list on their site that they have two of the 3/8" flare plugs in inventory, but standing in the store, looking in the location they indicated, damned if I could spot them. I asked an employee, who poked around for a couple of minutes and just apologized. I found the carton where they should have been - it had other odds and ends in it. Home Depot's inventory system generally seems to be pretty awful. I once hit three stores to find enough matching concrete blocks to finish a yard project. One store was missing a pallet of them, another was missing 3 pallets. If you can lose 3 pallets of wall blocks, I imagine a couple of brass fittings is nothing
1999 Premier, now minus all passenger side cabinets and appliances