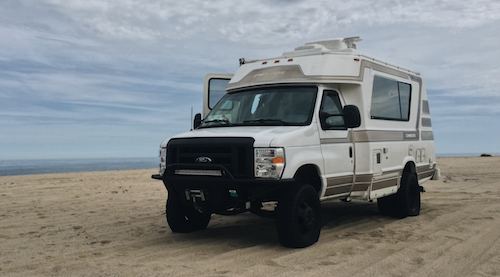
New To Us Chinook Makeover
Re: New To Us Chinook Makeover
Nice work, kinda looks like denim jeans material in the pictures.
-
NewTrailWagon
- Posts: 17
- Joined: October 7th, 2018, 7:04 am
Re: New To Us Chinook Makeover
Yes the photos aren't very good. Bad lighting, Here is what we used. It is actually a tweed.
https://www.perfectfit.com/15994/157084 ... ic-54.html
We ordered the Blue, and a Heather Grey that is going to cover the walls.
https://www.perfectfit.com/15994/157084 ... ic-54.html
We ordered the Blue, and a Heather Grey that is going to cover the walls.
-
NewTrailWagon
- Posts: 17
- Joined: October 7th, 2018, 7:04 am
Re: New To Us Chinook Makeover
We have new walls in, new b Pilars, and a new headliner. The Chinook is coming back to life inside.
- Attachments
-
-
-
-

Re: New To Us Chinook Makeover
It's fun to start putting things back together.
I have a few questions if you don't mind. I'm doing similar things so your experience would be appreciated.
1) Did you remove the side-wall wallboard to re-upholster it? Did that entail removing the window trim rings? Or how did you tackle that.
2) Is that the original fiberglass "entertainment" area molded piece that you reupholstered? Are you going to re-cut-out side openings or do you have other plans?
3) How was it re-fabricing the fiberglass B pillars? I did mine with essentially the same "headliner" fabric as the original (but a different color), but the compound curves were tricky, even with the very flexible fabric. I did two tries, getting better with each one. Probably should have stuck with the second one, but I decided to try a third time (haven't yet because I had to order more fabric).
I have a few questions if you don't mind. I'm doing similar things so your experience would be appreciated.
1) Did you remove the side-wall wallboard to re-upholster it? Did that entail removing the window trim rings? Or how did you tackle that.
2) Is that the original fiberglass "entertainment" area molded piece that you reupholstered? Are you going to re-cut-out side openings or do you have other plans?
3) How was it re-fabricing the fiberglass B pillars? I did mine with essentially the same "headliner" fabric as the original (but a different color), but the compound curves were tricky, even with the very flexible fabric. I did two tries, getting better with each one. Probably should have stuck with the second one, but I decided to try a third time (haven't yet because I had to order more fabric).
1999 Concourse
-
NewTrailWagon
- Posts: 17
- Joined: October 7th, 2018, 7:04 am
Re: New To Us Chinook Makeover
1) Did you remove the side-wall wallboard to re-upholster it? Did that entail removing the window trim rings? Or how did you tackle that.
I did remove the entire Side wall it came out in one piece. I removed all the screws holding in the window ring and the wall slid out. Quick note, remove the B Pillars before you do this and it will be easier.
2) Is that the original fiberglass "entertainment" area molded piece that you reupholstered? Are you going to re-cut-out side openings or do you have other plans?
That is the original fiberglass "entertainment" area. I Patched the openings where the TV and the VCR went and then put 1/8" poly foam over it and then covered it in upholstery. I am going to make a new cabinet door for the big center opening and that will be the only access point for the cabover compartment, because I am going to build the side overhead compartments up to the cabover compartment to rid the awkward gap that exists on the previous setup.
3) How was it re-fabricing the fiberglass B pillars? I did mine with essentially the same "headliner" fabric as the original (but a different color), but the compound curves were tricky, even with the very flexible fabric. I did two tries, getting better with each one. Probably should have stuck with the second one, but I decided to try a third time (haven't yet because I had to order more fabric).
The B Pillars took a lot of work and some precise relief cuts. We found the Adhesive and clothespins crucial to wrapping it well. Also we started on the flat hard edge first and then kind of rolled it pulling tight. We have one small wrinkle we might be able to iron out.
I did remove the entire Side wall it came out in one piece. I removed all the screws holding in the window ring and the wall slid out. Quick note, remove the B Pillars before you do this and it will be easier.
2) Is that the original fiberglass "entertainment" area molded piece that you reupholstered? Are you going to re-cut-out side openings or do you have other plans?
That is the original fiberglass "entertainment" area. I Patched the openings where the TV and the VCR went and then put 1/8" poly foam over it and then covered it in upholstery. I am going to make a new cabinet door for the big center opening and that will be the only access point for the cabover compartment, because I am going to build the side overhead compartments up to the cabover compartment to rid the awkward gap that exists on the previous setup.
3) How was it re-fabricing the fiberglass B pillars? I did mine with essentially the same "headliner" fabric as the original (but a different color), but the compound curves were tricky, even with the very flexible fabric. I did two tries, getting better with each one. Probably should have stuck with the second one, but I decided to try a third time (haven't yet because I had to order more fabric).
The B Pillars took a lot of work and some precise relief cuts. We found the Adhesive and clothespins crucial to wrapping it well. Also we started on the flat hard edge first and then kind of rolled it pulling tight. We have one small wrinkle we might be able to iron out.
Re: New To Us Chinook Makeover
Thanks so much for all your detailed replies. Very helpful!

OTOH, since I have had that piece completely off for awhile now (just hung fabric temporarily so it doesn't look messy), wow, is having it just be one big opening useful! I find that there are plenty of compartments with small openings, little drawers, tiny cubbies, etc. But what is always missing (for me) is a place to put my backpack or a similar larger thing. Plenty of space with that entertainment "face" gone. But of course it does look nice, so chances are I will adapt to the three openings once I put it back (at least the center one is not too small).
Again, thanks for the extra info.
BG
Oooh, super interested in how you might do that. I went a different way and (since I don't need TV or VCR) and cut out the passenger side to match the driver's side (former TV) opening. I glassed over the solar controller hole since that was outside the perimeter of my new opening. It's still out though, since I turned into a fabric perfectionistNewTrailWagon wrote: November 2nd, 2018, 6:50 am That is the original fiberglass "entertainment" area. I Patched the openings where the TV and the VCR went and then put 1/8" poly foam over it and then covered it in upholstery. I am going to make a new cabinet door for the big center opening and that will be the only access point for the cabover compartment, because I am going to build the side overhead compartments up to the cabover compartment to rid the awkward gap that exists on the previous setup.
OTOH, since I have had that piece completely off for awhile now (just hung fabric temporarily so it doesn't look messy), wow, is having it just be one big opening useful! I find that there are plenty of compartments with small openings, little drawers, tiny cubbies, etc. But what is always missing (for me) is a place to put my backpack or a similar larger thing. Plenty of space with that entertainment "face" gone. But of course it does look nice, so chances are I will adapt to the three openings once I put it back (at least the center one is not too small).
Again, thanks for the extra info.
BG
1999 Concourse
-
NewTrailWagon
- Posts: 17
- Joined: October 7th, 2018, 7:04 am
Re: New To Us Chinook Makeover
We have been working away. Got the seats and couch upholstered, We are getting those in. Have been busy building the framing for the cabinets using 80/20 Aluminum. The rig is being put back together. Have put some paint on the walls too. Waiting for more aluminum. We have decided to keep upper cabinets and are keeping the cocktail lounge. We are happy to have it all reupholstered. Also pictured an "art piece" cabinet for above the Fridge.
- Attachments
-
-
-
-
-
NewTrailWagon
- Posts: 17
- Joined: October 7th, 2018, 7:04 am
-
eporter123
- **Forum Contributor**
- Posts: 184
- Joined: April 2nd, 2018, 9:50 am
Re: New To Us Chinook Makeover
Wow, that's looking great. 80/20 is cool, I've been looking at some generic versions of it, been trying to find locally.
Maybe I missed it, but what are you attaching the upholstery with to the walls and ceiling? Just spray adhesive? Any specific kind?
Nice job on the Flexsteel reupholstery. Did you do that as well?
Interior looks so much better already!
Maybe I missed it, but what are you attaching the upholstery with to the walls and ceiling? Just spray adhesive? Any specific kind?
Nice job on the Flexsteel reupholstery. Did you do that as well?
Interior looks so much better already!
Former owner of a 2000 Chinook Premier, V-10, with no Interior...
-
NewTrailWagon
- Posts: 17
- Joined: October 7th, 2018, 7:04 am
Re: New To Us Chinook Makeover
We just used a spray Contact adhesive from DAP, applied using a spray gun. The furniture (Couch, Cocktail chairs and Flex steel Chairs) was done by KAR auto Upholstery in Sparks, NV. He did a great job and was incredibly quick and very responsive. We were very happy with the entire process with him.