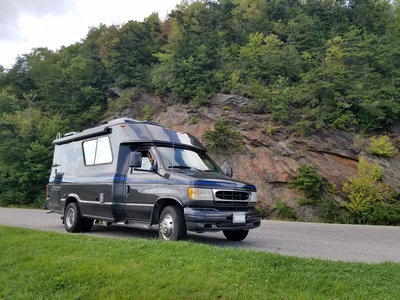
In response to request from Skillet during our "Trip Talk" conversation about Montana and Wyoming, here are some pics of interior/exterior projects made to "Turtle" our 2004 Premier.
The first three are interior showing the creation of a bookshelf in place of TV, an "object de Art" in slot where VCR (boy these rigs are old, aren't they!) used to be, and the new cabinet (double-doors and interior) in lieu of the microwave.
David
Interior and Exterior Projects
Interior and Exterior Projects
- Attachments
-
-
-
Re: Interior and Exterior Projects
Dang nice!
Did you building the cabinets or have them done? If someone else, are they still in business? (I've been looking for someone)
Thanks!
Did you building the cabinets or have them done? If someone else, are they still in business? (I've been looking for someone)
Thanks!
Re: Interior and Exterior Projects
Here are three more pics of "Turtle"...showing front-mount Swagman Dispatch Non-Folding Heavy Duty 2-bike hitch, the roof mounted kayaks (new rear-view camera also visible), and a close-up view of the foot for the roof rack. As mentioned previously, I use a set of "Easy-roller" wheels positioned just at the rear lip of the roof to ease the kayaks up into place on the racks.
Blue-Go, when I read your fine cautionary post about the lack of blocking on the side rail, I, of course, had to go right out and check it out more carefully. I've put about 1,000 miles on Turtle with the kayaks up top, and am pleased to report that the side rail seems to be holding fine (phew!). The screws holding mine (2004) in place seem to be more substantial than the #8's you referenced on your 1999...maybe they did make an improvement from the 1/2" strip of embedded ply...or maybe I'm just "flucky" is w(fuckin lucky) as my father used to say. As you can see by attached pic, the rack is held by foot turn clamp and two hose clamps--not the most elegant, but seem to be doing the trick. But your caution has registered with me and you can rest assured I will do frequent status checks as we head west.
While on the subject of blocking...I was disappointed that there was not adequate blocking in the wall below the window on the dinette side to hold the horizontal top piece upon which the table rests in the upright position. This was loose when I got the rig (probably from someone not tilting the table down enough before lowering it (to get it out of the "lip that is designed to hold it in place) and I had to drill new holes and insert more substantial mollies reinforced with adhesive to get things tight enough for me (as mentioned earlier, I HATE rattles of any kind). So far, seems to be holding fine, but I do anticipate a day when I will have to do some opening up of the wall to add my own blocking...such is life with a rig--even one as well built as our Chinooks.
- Attachments
-
-
-
Re: Interior and Exterior Projects
Manitou--I found a local cabinet maker who did these doors for me. I just gave him one of my existing doors from the cabinet below the stove and asked him to match as best he could. I agree, he did a terrific job (cost me about $200 all-in I think (he even matched the hinges). Then I installed myself.
The company is Dedham Cabinets. They are here in the Boston area. I can put you in touch with them if you are interested.
David
The company is Dedham Cabinets. They are here in the Boston area. I can put you in touch with them if you are interested.
David

Re: Interior and Exterior Projects
Looks nifty! It's great to see photos of the things you described in the Montana thread.  The VCR (plus CB radio and Mr. Coffee) did not even make it all the way through the trip home; but I kept the phone for awhile just because it made me laugh every time I saw it
I'm also having some cabinet work done on my rig, and also using a "small/real" cabinet-maker. Although I'm doing more than 1-2 doors, I have the same sense that a couple of doors would be very reasonable, and much, much better than I could do by, say, buying pre-made doors and trying to make them work. If you can find someone like this it's amazing (to me) how much improvement a relatively small expenditure can make in the day-to-day pleasure and usefulness of the rig.
Ha! Speaking of which, mine came with not only a VCR, but a wall phone. I know, you're probably enviousdeppstein wrote: an "object de Art" in slot where VCR (boy these rigs are old, aren't they!)
- phone.jpg (23.42 KiB) Viewed 6771 times
I'm also having some cabinet work done on my rig, and also using a "small/real" cabinet-maker. Although I'm doing more than 1-2 doors, I have the same sense that a couple of doors would be very reasonable, and much, much better than I could do by, say, buying pre-made doors and trying to make them work. If you can find someone like this it's amazing (to me) how much improvement a relatively small expenditure can make in the day-to-day pleasure and usefulness of the rig.
1999 Concourse
Re: Interior and Exterior Projects
Just to clarify slightly. I don't know what size screws are holding the rail on my 1999. I was remembering (hopefully correctly) what another Chinooker used when he replaced the originals with like size but new stainless. I'm still reasonably certain they are "pointy screws into plywood" though.deppstein wrote: Blue-Go, when I read your fine cautionary post about the lack of blocking on the side rail, I, of course, had to go right out and check it out more carefully. I've put about 1,000 miles on Turtle with the kayaks up top, and am pleased to report that the side rail seems to be holding fine (phew!). The screws holding mine (2004) in place seem to be more substantial than the #8's you referenced on your 1999
I have Chinook factory roof and wall drawings from the 1998-1999-2000 era. They show the placement, dimensions, and thickness of the various pieces of wood in the walls and roof. Very handy to have. In recently partially deconstructing the passenger side rear wall of my rig (remodel), I can say that the wood size/placement in mine matches the drawings.
Of course its entirely possible they changed/improved by 2004. Even on my drawings there are several "change notations" along with month and year plus notation of what changed.
Still, I wouldn't necessarily expect a "gross" failure of your rack attachment (i.e. boats flying down the highway), but what I would be more concerned about is that the screws attaching the Chinook railing to the roof's interior core would "work" under load, and then you could get hidden leaks and potential rot. Not saying it would or will happen, just what I would potentially wonder about (but then I'm probably conservative on that so take it with that grain of salt).
Now there I'm a little surprised. The drawings I have (and what I have found in my passenger side wall corroborates this) that there is a very large section of two 1/2 back-to-back sheets of ply around the dinette area window. These extend to around 5-6" below the bottom of the window. Then abutted to that (and centered below it) is a 29" tall, 38" long sheet of 3/4" plywood (presumably the change in thickness is because the wall of the rig tapers in somewhat). Perhaps that changed by 2004, but it would seem surprising if they made it "worse." Here is the 1998-99-2000 era drawing of the passenger wall, just in case you are interested:deppstein wrote:While on the subject of blocking...I was disappointed that there was not adequate blocking in the wall below the window on the dinette side to hold the horizontal top piece upon which the table rests in the upright position.
1999 Concourse
Re: Interior and Exterior Projects
Blue-Go...appreciate your responses...I too don't expect to see one of my kayaks flying through the air on my rear-view camera, but I am going to be making frequent checks (just the sort of thing that drives my wife nuts  ).
).
Where did you get the wall plan details? I would love to see if I can find something like that for my rig years. As I said, I fully expect that the time will come when some major re-construction will have to be done. Like my old house...always something.
It is interesting that what I found does not match the drawing you have. Just not that much plywood in my wall. I wish there was.
New "Project" Topic for you or anyone else who may be able to offer a comment:
I would love to find an easy way to get another 3-4 inches of clearance (bottom of back electric step is main problem I have run into--and I'd love to have a few more inches clearance on the holding tank drains (though not as bad due to their location right behind the rear wheels). I looked into 4x4, but decided against it for a bunch of reasons (cost, not really needed, more things to go wrong in future). Don't want to raise just the back and have slant. Any suggestions?
David
Re: Interior and Exterior Projects
Hi David,
First off, in case you read my note on the other thread where I am seeking "vertical" Premier upper cabinet dimensions, I now see you can "never mind," as you have one of the later Premiers with the sloping cabinets that are like the Concourse.
As to the wall and roof plans, I think it is just a lucky fluke that we have the 1999 era ones. Here is why I say that: The reason they were "put out there" in the first place, is -- from what I can tell -- because a prospective buyer was asking about a special roof reinforcement/construction for some particular rooftop apparatus. So Trail Wagons sent out a fax of plans to that person. The first two plans were the stock roof and stock passenger side wall, and then there were two more plans showing potential alternative roof reinforcement builds that Trail Wagons could do on a custom basis. Sadly there was no driver's side or rear wall info, although it's fairly easy to extrapolate.
I have read that Chinook went to more foam-cored/less plywood-reinforced construction, which in general is probably an improvement; but maybe a side result is that some areas didn't get as much plywood backing as one might have hoped. Hard to know.
Since you are a boater you may not need this suggestion, but I might do something along these lines if I had your rig (I, too, hate flimsy or rattling attachments!). First off, I doubt that the overall "hollow" wall thickness under that window is different ('course don't just start drilling based on that) in the later years. After all the wall molding is the same shape. So if that's the case, you should have around 1" (or 3/4" if lower down) of space to play with between inner and outer wall. Presuming there is some "piece" that will cover the fasteners (I don't have a dinette model, but there must be a wood strip or at least a bracket or something for the table?), I might reinforce that area with one of a few different methods.
1) Drill smaller hole though surface and into hollow area (hollow meaning foam or stripped-out wood or whatever you have). Use something like a Dremel #115 bit to "back cut" the hole so that the hole between the inner and outer walls is larger diameter than the access hole (don't go through outer wall of course!). Then pump some thickened epoxy into the void (this presumes it's not an endless hole or that you take measures to make it so). Then after that cures you can drill and tap it and use machine screw(s) to fasten the table bracket.
2) Another option is to buy some G-10 fiberglass rod from McMaster-Carr, drill and tap small "dowel shapes" of it, and then epoxy them into the holes (although I have had no problem drilling and tapping thickened epoxy).
One possible concern is that you don't want your new epoxy plugs to just "burst through" the thin inner wall (looks like 1/8" luaun perhaps). However if the epoxy grips the outer wall, and or if your "cylinders" are reasonably large, and/or you have few of them, it may be fine.
****
On the step: I noticed the same thing when I was Chinook shopping. That is that the newer units with the electric step left a fairly big "hanging down" section that reduced departure angle. Of course the electric step is sort of cool, but I looked for one with a manual step due to that factor, plus the fact that the drawbar for towing has to be even longer with the electric step (I tow sometimes). It wouldn't be the simplest conversion to go to a manual step (because I can see they raised the upper step as compared to the manual version to make room for the lower one) but I imagine it could be done. The company that I believe made the rear step/metal stuff (the parts that were not stock from Kwikee or whomever) is still in business - Atlas Metals in Yakima, WA.
Here are a few comparison photos. With the manual step you just lift and flip (all in one motion) the lower step and it ends up right-side up sitting right on top of the top step (so it becomes the new top step unless or until you flip it back down into lower step position). I am pretty sure the departure angle is better on the manual steps, but I have not measured both to be sure.
Electric step photos:
Deployed:
Retracted:
Manual step photos:
Lower step deployed:
See next post as there are only three photos allowed per post.
First off, in case you read my note on the other thread where I am seeking "vertical" Premier upper cabinet dimensions, I now see you can "never mind," as you have one of the later Premiers with the sloping cabinets that are like the Concourse.
As to the wall and roof plans, I think it is just a lucky fluke that we have the 1999 era ones. Here is why I say that: The reason they were "put out there" in the first place, is -- from what I can tell -- because a prospective buyer was asking about a special roof reinforcement/construction for some particular rooftop apparatus. So Trail Wagons sent out a fax of plans to that person. The first two plans were the stock roof and stock passenger side wall, and then there were two more plans showing potential alternative roof reinforcement builds that Trail Wagons could do on a custom basis. Sadly there was no driver's side or rear wall info, although it's fairly easy to extrapolate.
I have read that Chinook went to more foam-cored/less plywood-reinforced construction, which in general is probably an improvement; but maybe a side result is that some areas didn't get as much plywood backing as one might have hoped. Hard to know.
Since you are a boater you may not need this suggestion, but I might do something along these lines if I had your rig (I, too, hate flimsy or rattling attachments!). First off, I doubt that the overall "hollow" wall thickness under that window is different ('course don't just start drilling based on that) in the later years. After all the wall molding is the same shape. So if that's the case, you should have around 1" (or 3/4" if lower down) of space to play with between inner and outer wall. Presuming there is some "piece" that will cover the fasteners (I don't have a dinette model, but there must be a wood strip or at least a bracket or something for the table?), I might reinforce that area with one of a few different methods.
1) Drill smaller hole though surface and into hollow area (hollow meaning foam or stripped-out wood or whatever you have). Use something like a Dremel #115 bit to "back cut" the hole so that the hole between the inner and outer walls is larger diameter than the access hole (don't go through outer wall of course!). Then pump some thickened epoxy into the void (this presumes it's not an endless hole or that you take measures to make it so). Then after that cures you can drill and tap it and use machine screw(s) to fasten the table bracket.
2) Another option is to buy some G-10 fiberglass rod from McMaster-Carr, drill and tap small "dowel shapes" of it, and then epoxy them into the holes (although I have had no problem drilling and tapping thickened epoxy).
One possible concern is that you don't want your new epoxy plugs to just "burst through" the thin inner wall (looks like 1/8" luaun perhaps). However if the epoxy grips the outer wall, and or if your "cylinders" are reasonably large, and/or you have few of them, it may be fine.
****
On the step: I noticed the same thing when I was Chinook shopping. That is that the newer units with the electric step left a fairly big "hanging down" section that reduced departure angle. Of course the electric step is sort of cool, but I looked for one with a manual step due to that factor, plus the fact that the drawbar for towing has to be even longer with the electric step (I tow sometimes). It wouldn't be the simplest conversion to go to a manual step (because I can see they raised the upper step as compared to the manual version to make room for the lower one) but I imagine it could be done. The company that I believe made the rear step/metal stuff (the parts that were not stock from Kwikee or whomever) is still in business - Atlas Metals in Yakima, WA.
Here are a few comparison photos. With the manual step you just lift and flip (all in one motion) the lower step and it ends up right-side up sitting right on top of the top step (so it becomes the new top step unless or until you flip it back down into lower step position). I am pretty sure the departure angle is better on the manual steps, but I have not measured both to be sure.
Electric step photos:
Deployed:
Lower step deployed:
1999 Concourse
Re: Interior and Exterior Projects
More manual step:
Deployed:
Retracted (flipped up):
Looks like there is carpet on these, so slightly hard to see detail.
Deployed:
Looks like there is carpet on these, so slightly hard to see detail.
1999 Concourse
Re: Interior and Exterior Projects
You are exactly right about the construction of my 2004 rig--more foam-core layed up and less plywood with open space between. When I installed the mollies, I did something similar to your suggestion of epoxy plug--and happy to say I DID NOT penetrate the outside skin! If I need to do more, I will open up enough of a channel (but still able to be covered by the horizontal cross-piece that holds the table upright at the wall) to insert blocking across the entire width of the window that I will epoxy in place. When/if comes to that, I'll fill you in. Does remind me of my childhood...was 1963 and for $113 my dad bought me a Sailfish kit that was pre-cut marine ply with ribs, keel strip, mast-step, railings, dagger board, tiller, with that lanteen rig and all hardware. I sailed it on Lake Michigan for years. Fond memories--in fact, I've toyed recently with the idea of going down to the non-profit wooden boat building school in Newport RI to check out volunteer opportunities. But travels in Turtle have conspired to keep me focused on other things...for now.
Don't think I'll revert to manual step. Just do a better job of angling out of those sloped gas station driveways for now.
Thanks again for sharing your thoughts and ideas with me. Much appreciated.
David
Don't think I'll revert to manual step. Just do a better job of angling out of those sloped gas station driveways for now.
Thanks again for sharing your thoughts and ideas with me. Much appreciated.
David